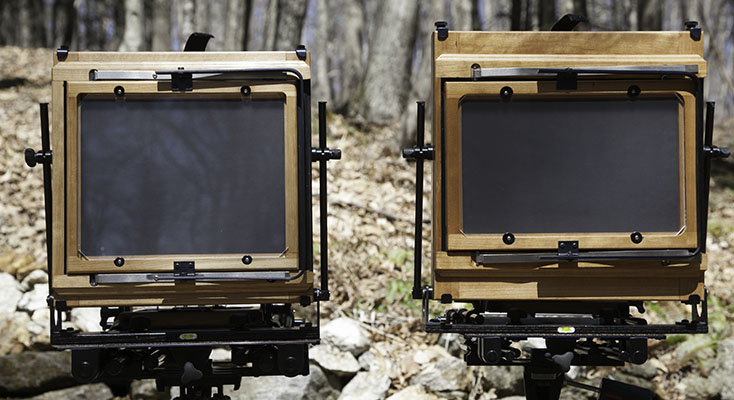
8 x 10 7 x 11
SPECIFICATIONS
4 x 10 Camera
Custom Black
8 x 10 Camera
with the back removed
Front shift 5 (127mm) total movement
Front raise 4.5 (114mm)and fall 3 (76mm)
Front tint base 25 degrees forward
90 degrees back
Front lens axis tilt limited by bellows
Front swing limited by bellows
Standard bellows 32 (812mm), 2 (50mm)min
Other lengths custom order
Standard lens board size
5.5 x 5.5/Sinar or 6 x 6
Custom options available:
- Different lens board mount
- Longer or shorter rail system & bellows
- Removable bellows and bag bellows
Rear swing 20 degrees
Rear shift 2.5 (64mm) total movement
Rear tilt 20 degrees back 90 degrees forward
Bail back
Levels on rear for horizontal & plumb
Weight
8 x10 ~6.4 pounds
Other available backs
- 4 x 5 Back
- 5 x 7 back
- 5 x 8 back
- 7 x 11 back
- 5 x 12 back
- 4 x 10 back will go to vertical
- Other sizes inquire
Custom built left handed
8 x 10 camera
Cherry 8 x 10
$3485
Cherry 8 x 10
With removable bellows
$4485
includes bag bellows
Cherry 7 x 11
$3685
8 x10 back to fit camera
$685
Cherry 5 x12
$3685
goes to vertical
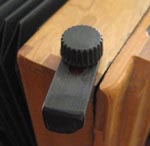
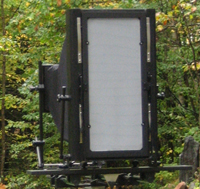
Lock knob and sliding lock
that hold the back on
Changing the back from Horizontal to Vertical
It has been assumed by some that the way the back rotates from horizontal to vertical on the 8 x 10, 11 x 14, 14 x 17, 16 x 20 and 20 x 24 cameras is that the back, box, bellows ect come off and rotate the same way as the panorama camera. This is wrong.
After years of working with and on cameras with different ways of holding the back on I settled with a design that was first used on a camera in 1870. See photo. It is a combination of sliding lock and lock knob. I found this to be the best.
Why?
Pins: As used on Deardorf, Wisner, D2. ect. Pins have to be drilled to the camera back and hardware of each camera, are hard to interchange backs with other cameras. The area where the pins are located sometimes breaks away. The closing hardware wears out and breaks. Pins fall out. The back rattles around due to sloppy holes. I have also had backs fall off the camera from the hardware getting caught on a branch and releasing the back from the body of the camera or the pins just did not catch right and the back just pops off when you turn your back to the camera.
Sliding lock: Wisner, Zone VI. The locking hardware when transporting the camera over the shoulder on a tripod sometimes catches on a branch and pulls the sliding lock open allowing the back to drop off.
Sliding lock with lock knob (see photo). Positive locking system of the back to the body of the camera, nothing for branches to get caught on and release the back from the camera. System works by loosing the lock knob a half turn and sliding the bracket out of the way. Turn back and reverse the steps. No worry of the back falling off the camera when transporting the camera on a tripod through brush and branches.
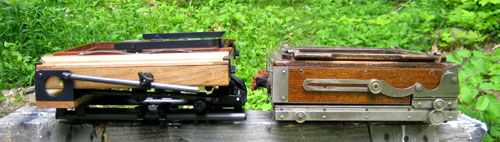
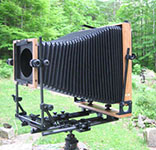
Camera folded 14 x15 x 5 3/4 weight 6.4 pounds
Next to a Deardorf 13 x 15 x 5 weight 13 pounds
Sizes includes knobs